


Ultimate Guide to Installing and Optimizing Your Performance Boost Controller for Mitsubishi Lancer Evo: A Complete Step-by-Step Approach to Boost Controllers and Their Importance
When it comes to enhancing the performance of your Mitsubishi Lancer Evo, one of the most critical components to consider is the boost controller. This device plays a pivotal role in managing the turbocharger’s boost pressure, which directly impacts your car’s power output, fuel efficiency, and overall driving experience.
A boost controller allows you to fine-tune the boost pressure to optimize your engine’s performance under various driving conditions. Here’s why it’s essential:
Topic to read : Mastering mclaren 720s: your comprehensive handbook for installing and tuning a performance data logger to unlock exceptional track insights
- Customizable Power: Unlike the stock boost control system, a performance boost controller lets you adjust the boost pressure to suit your driving style and the conditions you’re in.
- Improved Fuel Economy: By optimizing boost pressure, you can achieve better fuel economy, especially during everyday driving.
- Enhanced Reliability: Proper boost control helps in reducing the stress on your engine and turbocharger, leading to a longer lifespan.
Choosing the Right Boost Controller for Your Mitsubishi Lancer Evo
Before diving into the installation process, it’s crucial to select the right boost controller for your vehicle. Here are some key factors to consider:
Types of Boost Controllers
- Manual Boost Controllers: These require manual adjustment of boost pressure via a dial or knob. They are simple but require frequent adjustments.
- Electronic Boost Controllers: These use electronic sensors and actuators to automatically adjust boost pressure based on predefined settings. They offer more precision and convenience.
- Pneumatic Boost Controllers: These use pneumatic signals to control boost pressure and are often used in conjunction with other electronic systems.
Compatibility and Features
- Ensure the boost controller is compatible with your Mitsubishi Lancer Evo’s model year and engine type.
- Look for features such as adjustable boost pressure, over-boost protection, and integration with your car’s ECU.
### Example of Boost Controller Features
| Feature | Manual Boost Controller | Electronic Boost Controller | Pneumatic Boost Controller |
|
|-------------------------|
|----------------------------|
| Adjustment Method | Manual Dial | Electronic Sensors | Pneumatic Signals |
| Precision | Low | High | Medium |
| Convenience | Low | High | Medium |
| Over-Boost Protection | No | Yes | Yes |
| ECU Integration | No | Yes | Yes |
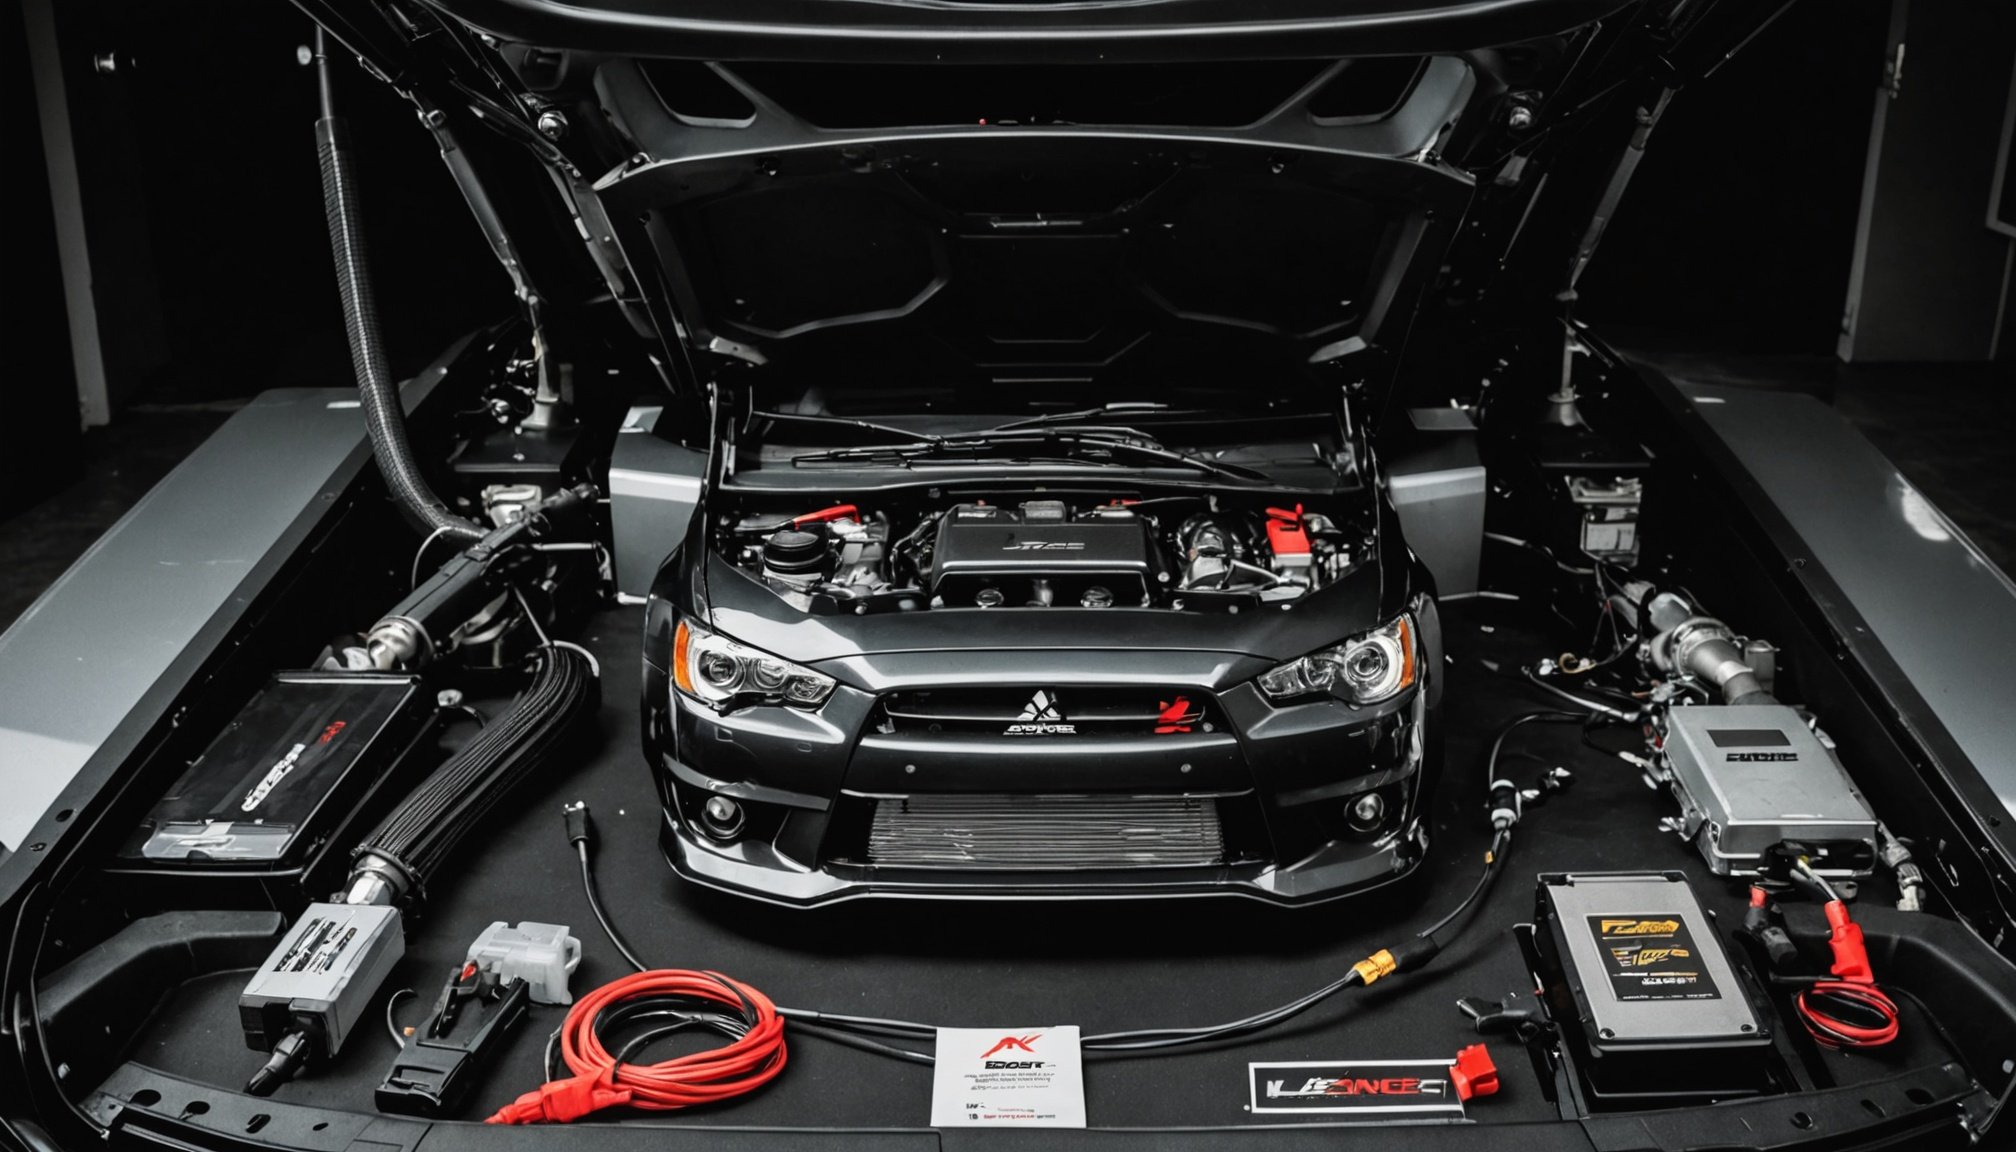
Step-by-Step Installation Guide
Installing a boost controller requires careful planning and execution to ensure it works seamlessly with your car’s existing systems.
Also read : Ultimate guide to turbocharger care: boost your bmw 335i’s performance with these key maintenance tips
Pre-Installation Checklist
- Consult Your Manual: Refer to your Mitsubishi Lancer Evo’s service manual and the boost controller’s installation guide.
- Gather Tools and Materials: Ensure you have all necessary tools, wiring, and connectors.
- Prepare Your Workspace: Choose a clean, well-lit area with minimal distractions.
Connecting the Boost Controller
- Locate the Turbocharger Actuator:
- This is usually found on the turbocharger itself. Consult your manual for specific locations.
- Disconnect the Stock Actuator:
- Carefully disconnect the electrical and pneumatic connections from the stock actuator.
- Install the New Actuator:
- Connect the new actuator to the turbocharger, ensuring all connections are secure.
- Wire the Boost Controller:
- Connect the boost controller to the actuator and your car’s ECU if applicable. Follow the manufacturer’s wiring diagram.
### Wiring Connections Example

- **Boost Controller to Actuator**:
  - Connect the pneumatic hose from the boost controller to the actuator.
  - Connect the electrical wires according to the manufacturer’s instructions.
- **Boost Controller to ECU**:
  - If your boost controller integrates with your ECU, connect the necessary wires.
  - Ensure all connections are secure and insulated to prevent damage.
Setting Up Your Boost Controller
- Power Up Your System:
- Start your engine and let it warm up to ensure all systems are operational.
- Configure Your Settings:
- Use the manufacturer’s software or interface to set your desired boost pressure levels.
- Adjust settings for different RPM ranges and driving conditions.
Tuning Your Engine for Optimal Performance
Tuning your engine is crucial after installing a boost controller to ensure everything works in harmony.
Understanding Your ECU
- Factory ECU:
- The factory ECU has pre-programmed settings that may not be optimized for your new boost controller.
- Tuning Software:
- Use software like Tuner Studio or similar tools to adjust fuel injection, ignition timing, and other parameters.
Key Tuning Parameters
- Fuel Injection:
- Adjust fuel pump settings to ensure adequate fuel supply under increased boost pressure.
- Monitor fuel economy and adjust as necessary.
- Ignition Timing:
- Advance or retard ignition timing based on boost pressure to prevent engine knock or pinging.
- Rev Limit:
- Adjust the rev limit to protect your engine from over-revving under high boost conditions.
### Tuning Parameters Checklist

- **Fuel Pump Settings**:
  - Ensure the fuel pump can supply enough fuel at high boost pressures.
  - Monitor fuel pressure and adjust the fuel pump duty cycle if necessary.
- **Ignition Timing**:
  - Advance ignition timing at lower boost pressures.
  - Retard ignition timing at higher boost pressures to prevent engine knock.
- **Rev Limit**:
  - Set a safe rev limit to protect your engine from over-revving.
  - Adjust based on your driving style and the conditions you're in.
Common Issues and Troubleshooting
Even with a well-planned installation, issues can arise. Here are some common problems and how to troubleshoot them:
Over-Boosting
- Symptoms: Engine knock, reduced power, or warning lights on the dashboard.
- Solution: Check the boost controller settings and adjust them to prevent over-boosting. Ensure the actuator is properly connected and functioning.
Under-Boosting
- Symptoms: Reduced power output, poor engine performance.
- Solution: Check the boost controller settings and adjust them to increase boost pressure. Ensure there are no leaks in the pneumatic system.
Electrical Issues
- Symptoms: Erratic boost pressure, warning lights on the dashboard.
- Solution: Check all electrical connections for security and insulation. Use a multimeter to diagnose any wiring issues.
Practical Insights and Actionable Advice
Here are some practical tips to keep in mind when working on your Mitsubishi Lancer Evo:
Monitor Your Engine
- Keep a close eye on your engine’s performance, monitoring parameters like fuel economy, engine temperature, and boost pressure.
- Use data logging tools to track performance over time and make adjustments as needed.
Regular Maintenance
- Regularly check and maintain your turbocharger, fuel pump, and other critical components to ensure they are in good working condition.
- Follow the manufacturer’s maintenance schedule to prevent premature wear.
Community Feedback
- Join forums or communities of Mitsubishi Lancer Evo owners to share experiences and learn from others who have installed boost controllers.
- Read reviews and feedback on different boost controllers to make an informed decision.
### Community Feedback Example

- "I installed an electronic boost controller on my Lancer Evo and saw a significant increase in power output. However, I had to adjust the fuel pump settings to prevent fuel starvation under high boost." - John D., Evo Forum Member
- "Make sure to check for any leaks in the pneumatic system after installation. I found a small leak that was causing erratic boost pressure." - Sarah K., Evo Owner
Installing and optimizing a performance boost controller for your Mitsubishi Lancer Evo is a rewarding project that can significantly enhance your car’s performance. By following this step-by-step guide, you’ll be well on your way to unlocking your car’s full potential.
Remember, tuning is an ongoing process, and continuous monitoring and adjustments are necessary to ensure your engine runs smoothly and efficiently. With the right tools, knowledge, and a bit of patience, you can transform your stock Lancer Evo into a high-performance machine that delivers exceptional power and driving excitement.
### Final Checklist

- **Boost Controller Installation**:
  - Connect the new actuator to the turbocharger.
  - Wire the boost controller to the actuator and ECU.
- **Tuning Your Engine**:
  - Adjust fuel injection and ignition timing.
  - Set a safe rev limit.
- **Regular Maintenance**:
  - Check and maintain critical components.
  - Follow the manufacturer’s maintenance schedule.
- **Monitoring Performance**:
  - Use data logging tools to track performance.
  - Monitor engine parameters regularly.

By following this guide, you'll be able to optimize your Mitsubishi Lancer Evo's performance, ensuring it runs like a well-oiled machine and delivers the power and excitement you crave.